In this
tutorial I am going to show you all detailed steps I have taken to
create awesome Grunge Style Poster with Cubism Background.
When
following my steps, you are going to use basic instruments- Paint
Bucket tool, Polygonal Lasso tool, Text tool, two brushes, Layer Mask
and lots of Blending Options.
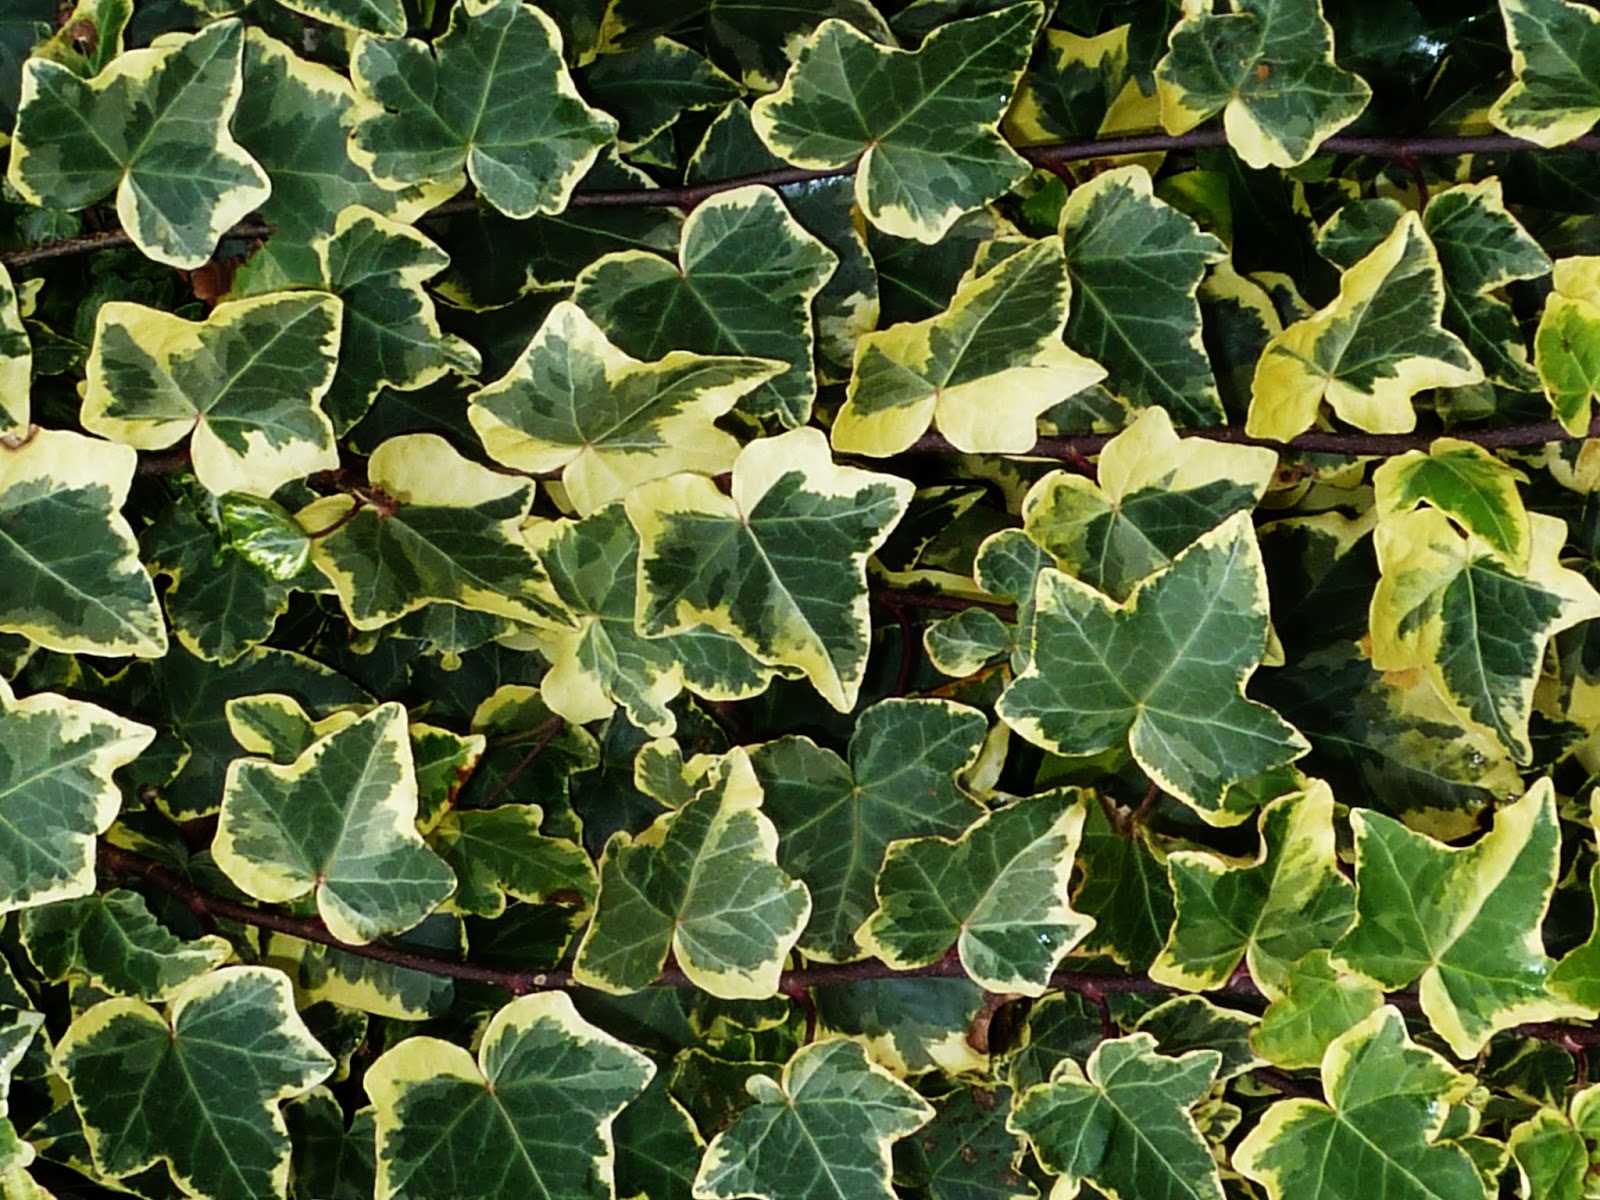
The
Cork Tree Bark Texture added to the Background is my own photo and
unrestricted stock.
This is
the result you should get:
STEP 1
Create a
New Folder where you are going to keep your .psd file, the Texture
you need to download and the final result saved in .jpg, .png or any
other format you prefer.
Now open
Adobe Photoshop and go to File, New to create a new document. Name it
Grunge Poster, then insert 2900 Pixels for Width and 4000 Pixels for
Height. Insert also 300 Pixels/Inch for Resolution. Select CMYK Color
from Color Mode drop down menu and Transparent for Background
Contents.
Rename
Layer 1 to Background then press Ctrl+G to create a group named
Background too.
Create
Cubism Style Background with Cork Texture, Polygonal Lasso Tool and
Plastic Wrap-Dark Brush
STEP 2
With the
Background layer selected, navigate to the Tools bar and Set
Foreground Color to #2a5347 then grab Paint Bucket tool and drag once
on your canvas to colorize it.
STEP 3
Double
click on Background layer's thumbnail to activate Layer Style dialog
box (Layer, Layer Style, Blending Options). Check Inner Shadow and
modify three of its settings: reduce Distance to 0px, increase Size
to 119px and find Half Round Contour in the Contour Picker. Thus you
created thin Vignette Effect on the borders of your canvas.
This is
the result you should get after applying the Inner Shadow:
STEP 4
Click on
this Cork Tree Bark Texture to open it in high resolution then right
click and choose Save Image As to download it. We are going to work
with this Texture in the coming steps.
STEP 5
Create a
New Layer on top of Background group and call it Cork Tree Bark
Texture.
Open in
Photoshop the Texture you downloaded in Step 4, press Ctrl+A to
Select it then press Ctrl+C to copy its image.
Return to
your Grunge Poster .psd document, verify that Cork Tree Bark Texture
layer is selected and press Ctrl+V to Paste the Texture there.
Use Edit,
Free Transform to adjust the Size of the Texture to the Size of your
canvas then press Enter key to apply the Transformation.
STEP 6
Change the
Blend Mode of Cork Tree Bark Texture layer to Soft Light.
STEP 7
Now Create
a New Layer on top of Background group and name it Shapes. In this
step we have to draw the Cubism Style shapes which will improve our
Background.
Grab
Polygonal Lasso tool and draw Shapes similar to mine shown on the
screenshot below. Fill them with colors according to your taste. As
you can see, I have used these five Color Codes: #e27635, #822786,
#afb144, #569899, #ae284b.
STEP
8
Change the
Blend Mode of Shapes layer to Overlay.
STEP 9
In this
and the next step we have to give our Shapes relief and texture so
double click on Shapes layer's thumbnail to activate Layer Style box
and firstly tick Bevel and Emboss. Decrease Depth to 40% and Size to
3px, then select Cone-Asymmetrical from the Contour Picker and change
Color for Highlight to #ffb849.
STEP 10
Check
Texture Layer Style which is below Bevel and Emboss. Find Woven Wide
(120 by 240 pixels, Grayscale Mode) from the Pattern Picker, change
Scale to 239% and Depth to 200%.
This is
how our Shapes will look after we have added texture and volume:
STEP 11
Create a
New Layer called Plastic Wrap- Dark Brush after the Brush we are
going to use in this step and place it on top of Background group.
Set
Foreground Color to #6b6d1a then grab Brush tool and find Plastic
Wrap- Dark Brush in the Brush Preset Picker. Set its Size to 1000px
and start brushing the borders of the canvas as you see on the
screenshot below.
If the
chosen Brush is not exclusive for your Photoshop version, you can
replace it with any Spatter Brush.
STEP 12
Double
click on Plastic Wrap- Dark Brush layer's thumbnail to make Layer
Style box pops up on your screen. Firstly tick Drop Shadow Layer
Style, lower its Distance to 0px and increase Size to 19px.
STEP 13
Now check
Gradient Overlay in Layer Style dialog box and change these five
settings:
Blend
Mode: Overlay
Opacity:
30%
Gradient:
choose Red-Orange, Blue-Green Gradient
from the
Gradient Picker
Style:
Reflected
Angle: 90
degrees.
STEP 14
Let us add
3D Effect to our greenish border in order to make it resemble lichen.
So check Bevel and Emboss Layer Style, increase its Depth to the
maximum of 1000%, slightly heighten the value of Size to 10px and
choose Ring from the Contour Picker.
Set Color
for Highlight to #98b029 and reduce its Opacity to 45%.
This
should be your outcome after applying the three Blending Options on
Plastic Wrap- Dark Brush layer:
Create
Text, Apply Blending Options, Crosshatch Brush and Layer Mask
STEP 15
In this
step you should type any Text you like. It is not necessary to use
the same Text I have typed and with the same tool settings, so you
can use this Step 15 only as a guideline.
Well, now
grab Horizontal Type tool and type some Text of your choice. For mine
I have chosen default Aharoni Font of 71.55pt Size (Center Text
Option have to be checked) and also inserted Color Code #9dc7fb for
Text Color. I have also left Tracking to the default 50.
Move your
Text layer on top of Layers panel and press Ctrl+G to put it in a
group called Text.
STEP 16
In this
and the coming four steps we have to apply Blending Options to make
our Text more attractive. So right click on the Text layer, select
Blending Options and tick Drop Shadow. Change its Distance to 3px,
Spread to 60% and size to 34px.
STEP 17
Now apply
Gradient Overlay on the Text layer. Select Green, Blue, Yellow
Gradient from the Gradient Picker, set its Style to Reflected and
verify that the Angle is automatically set to 90 degrees.
STEP
18
The third
Layer Style we need to add to the Text layer is Inner Shadow.
Increase its Distance to 15px, Choke to 24% and Size to 16px.
STEP 19
In this
step we have to add thin golden shaded Stroke to our Text. For the
purpose tick Stroke Layer Style and modify the following settings:
Size: 5px
Fill Type:
Gradient
Gradient:
Select Gold from the
Gradient
Picker
Style:
Reflected
Angle: 90
degrees.
STEP 20
The last
Layer Style we have to apply on the Text layer is Bevel and Emboss.
Choose
Pillow Emboss for Style, change Size to 43px, then Set Color for
Highlight to #fdff42 and color of Shadow to #837224.
This is my
outcome after applying the previously described Blending Options on
the Text:
STEP 21
It would
be really cool if we add Texture to our Text Effect. We can do this
with the help of a simple Brush.
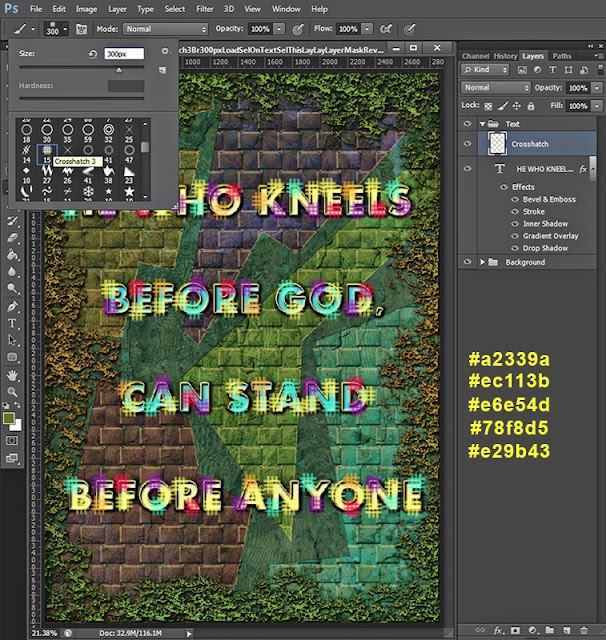
Firstly
Create a New Layer on top of Text group and name it Crosshatch after
the Brush we are going to use.
Select
Brush tool and find Crosshatch 3 Brush in the Brush Preset Picker.
Set its Size to 300px and start making dabs over the Text with
different colors. I have used the following Color Codes: #a2339a,
#ec113b, #e6e54d, #78f8d5, #e29b43.
Your
result should resemble my outcome shown on the screenshot below. It
is not necessary to be absolutely the same.
STEP 22
Change the
Blend Mode of Crosshatch layer to Linear Light and reduce the Fill
Opacity to 50%.
STEP 23
Double
click on Crosshatch layer's thumbnail to activate Layer Style box and
apply Bevel and Emboss. Increase only its Depth to 490%, slightly
lower Size to 3px and leave all other default settings unchanged.
This is
how the Crosshatch Texture will look after applying the 3D Effect:
STEP 24
Keep
Crosshatch layer highlighted then hold down Ctrl key and click on
your Text layer's thumbnail to Load Selection on the Text. Click also
on Add Layer Mask icon (Layer, Layer Mask, Reveal Selection) at the
bottom of Layers panel.
Below is
shown my result after adding Layer Mask to Crosshatch layer.
Compare
your Layers panel with mine. You should have these groups and layers
there:
Background
group with four layers in it: Background, Cork Tree Bark Texture,
Shapes and Plastic Wrap- Dark Brush and
Text
group which consists of two layers: Text layer and Crosshatch layer.
I don't
recommend you to rasterize your Text layer. Better leave it editable
because you might decide to change it or just to use another Font.
STEP 25
This is my
Grunge Poster saved in .jpg format.
Hope you
learned new techniques from this tut and find it useful.
Many
thanks for reading and God bless! :)