In this tutorial I will
show you how to create a vortex of pink and purple rays with golden
highlights in Adobe Illustrator.
In order to create the
Pink Rays, we are going to use Average command, Rotate Tool, Twist
Warp and Clipping Mask. I used Illustrator CS4 to create this
artwork, but all other CS versions of the program are applicable.
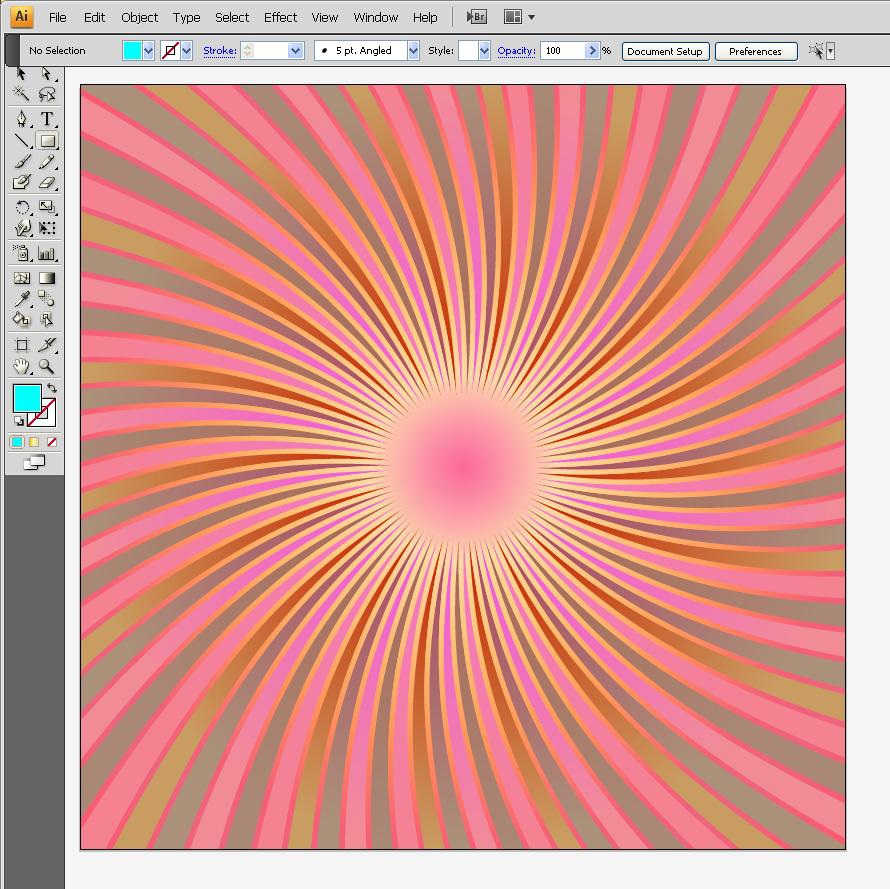
This
should be your final result:

STEP
1
Create a
new .ai document by selecting File, New, then choose Basic RGB
Document. From Units drop down menu select Milimeters and set Width
and Height to 270mm both.

Create
Gradient Background with Segmented Circle
STEP
2
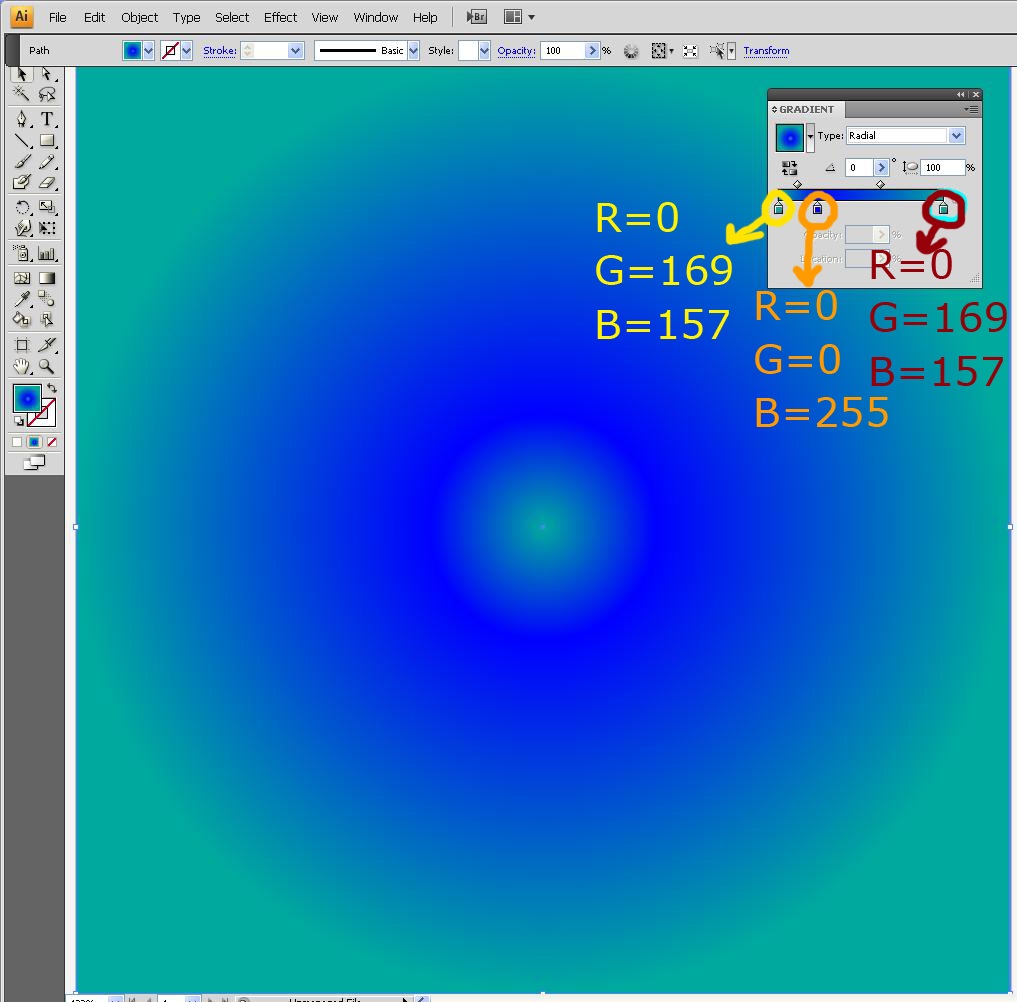
Take
Rectangle Tool and draw a square covering your artboard. Fill the
square with Radial type Gradient. For the first gradient swatch
choose this color: R=0, G=169, B=157. The color of second gradient
swatch is a darker blue: R=0, G=0, B=255 and the color of third
gradient swatch is: R=0, G=169, B=157. This will be our Background.
As we won’t manipulate it anymore, select it with Selection Tool
and go to Object, Lock, Selection.
STEP
3
Using
Rectangle Tool again draw a rectangle as you see on the following
screenshot. Fill it with any color (no Stroke color!). As you can see
I have chosen pink color from the default Swatches but later it will
be changed.

STEP
4
Grab
Direct Selection Tool and select both bottom points of the previously
drawn rectangle, then go to Object, Path, Average. When Average
dialog box appears, choose Both axis. This will turn your rectangle
into a ridged triangle.

STEP
5
While the
rectangle is selected, add 6px Stroke of any color. I have chosen
dark red (R=193, G=39, B=45) but it will be changed in the next step.

STEP
6
With the
triangular shape selected, click on Object menu, Choose Expand, in
the dialog box uncheck Fill option and leave only Stroke option
checked, then press OK.
Deselect
the object. Now take Direct Selection Tool and select only the
Stroke. Fill with the following Linear Gradient with Angle 90
degrees:
First
Gradient Swatch (Location 0%): R=251, G=201, B=38;
Second
Gradient Swatch (Location 47%): R=255, G=251, B=204;
Third
Gradient Swatch (Location 75%): R=238, G=214, B=136;
Fourth
Gradient Swatch (Location 100%): R=255, G=251, B=204;

STEP
7
In this
step I decided to change the Fill of the triangle. Using Direct
Selection Tool select only the Fill of the object (not the Stroke)
and choose a nice purple Fill Color: R=171, G=74, B=156.

STEP
8
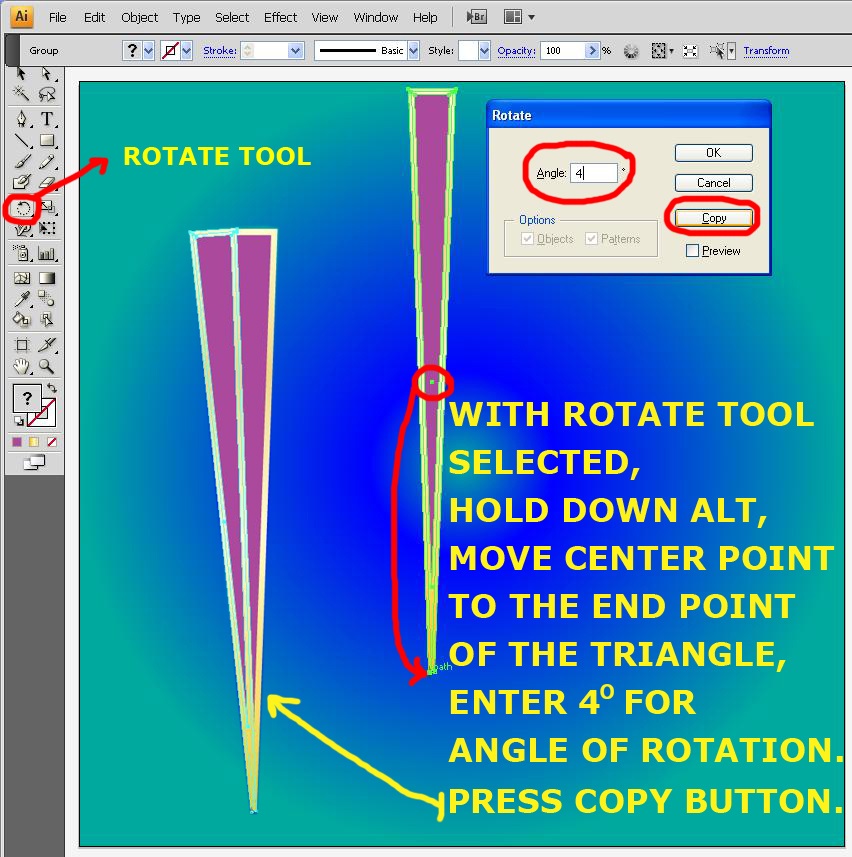
Reselect
the triangle with Selection Tool. Take Rotate Tool, hold down Alt key
and at the same time click on the center point of the triangle (don’t
release left mouse key), move the center point to the end point of
the triangle and release the mouse key. Rotate dialog box appears on
your artboard. Enter 4 degrees in Angle option and press Copy button.
This will rotate and duplicate the object at the same time. See the
screenshot for this Step as a reference for your actions.
STEP
9
One copy
is not enough to create an image full of rays. So start pressing
Ctrl+D a few times until you close the circle of rays. Your artboard
should look like my screenshot.

Add
New Colors, Apply Twist Warp and Clipping Mask
STEP
10
You can
leave all your rays in one and the same purple color we already
choose. I decided to add more colors. As you see on the following
screenshot, I have used four additional colors to make my rays more
dazzling. For the purpose you should select with Direct Selection
Tool the respective triangle (select only the Fill, not the Stroke)
and change its color. I used these colors:
- R=201, G=40, B=255
- R=244, G=120, B=59
- R=169, G=103, B=170
- R=241, G=90, B=34

STEP
11
With
Selection Tool select all objects (except the background) on your
artboard. Group them (Object, Group or Ctrl+G), then go to Effect,
Warp, Twist, leave the default options and press OK button. Have a
look at the screenshot to this step to see the result.

STEP
12
Keep the
group of twisted objects selected. Go to Transparency panel (Window,
Transparency) and set the Blend Mode to Exclusion. Deselect.

STEP
13
We
are almost done. As you can see, the rays go out of the artboard
borders. In order to keep object (s) within the artboard, we are
going to apply Clipping Mask. Draw a rectangle of any color, which
covers the artboard. With Selection Tool select both the rectangle
and group of rays, right click and select Make Clipping Mask.

STEP
14
After following this step-by-step tutorial, the result of your work
should be an image like the one on the following screenshot. If you
have locked the selection of your Background in Step 2, just go to
Object, Unlock All so that to be able to manipulate all your objects
if you like to change colors and shapes.
STEP
15
This is
the final result. If you have some questions, you are welcome to send
me a personal message. I will be glad to help you. Good luck and
enjoy the tutorial.

No comments:
Post a Comment